

I recently installed a set of Bushwacker fender flares onmy2013 Toyota FJ Cruiser. It was a change from the naked look I was previously rocking—byI, I mean myFJof course. In other words, I had removed the stock fenders a while back, and now I’ve gone from no fenders to these Bushwacker ones. The addition gives the cruiser a beefier look, while also making it look somehow more polished. It looks great! Here are the basic steps I went through to install them.
Opening the Package
I received the box for the kit—a very, VERY big box—and opened itupto check out the parts. I laid them all out and read over the manual, which describes all of the components that should be included and walks through the installation process step-by-step. Everything looked like it should, so I got to work.
Preparing the Area
First, I needed to clean and prep the areas of the FJ where the Bushwackers would be going. I happened to have a sticker on that area on one side, so I had to carefully remove it with a razor blade. Then, I cleaned off as much of the dirt and grime as I could from the area around the wheel wells. MyFJ goes ona lot of adventures, so there was a lot of dirt. I used a wax-type cleaner todo the job. Next, I needed to make a minor modification to the lower body molding on the cruiser. There is a part of the plastic trim that extends slightly into the wheel well, which would bein the way of the new fenders. I simply cut that piece off in a smooth line down, following the shape of the wheel well. Lastly, I removed the bolts from the inside of the wheel well to make room for the new bolts I would be using as part of the installation—all of which is described in detail in the manual, of course.
Prepping the Fenders
There were only a few simple steps required to prepare the fender flares. First, I puton the included trim liner, a thin strip of rubbery material that forms a transitional seam from the fender to the truck body. It sticks right on the fenders, not on the truck. I was careful to run the liner smoothly along the edge of the fender and around all the curves, so that it stuck well. Next, I puton the decorative nuts and bolts that line the fender for that tough-looking style.
Installation
The next step was to put the fenders on the FJ and bolt them on from underneath. One of the fasteners included in the kit is a specialty pin-type fastener rather than a bolt, and it goes in a specific hole; again, all is explained well in the manual. I started with the front wheels, and had an easy time with it; it was assimple as setting the fender in place, fastening it on, and repeating on the other side. Then I moved onto the back fenders, which took more effort and most of the time to install. For the back wheels, the fender flares come in two pieces which need tobe bolted together. I also had to make a modification to the fenders on the back, because I have an Expedition One Trail bumper installed and they couldn’t fit with it without modification. After determining where to cut, I put the Dremel tool to work and carefully carved some of the edge off in a square shape to frame the bumper, until the fit was just right. Then I went to work on the smaller piece which goes on the end of the fender at the bottom of the arc. I modified itin a similar way, carving out a rectangular section to make room for my bumper. I repeated the modifications on the rear fenders for the other side as well. After that, I bolted the pieces together and finally, installed them on both sides.
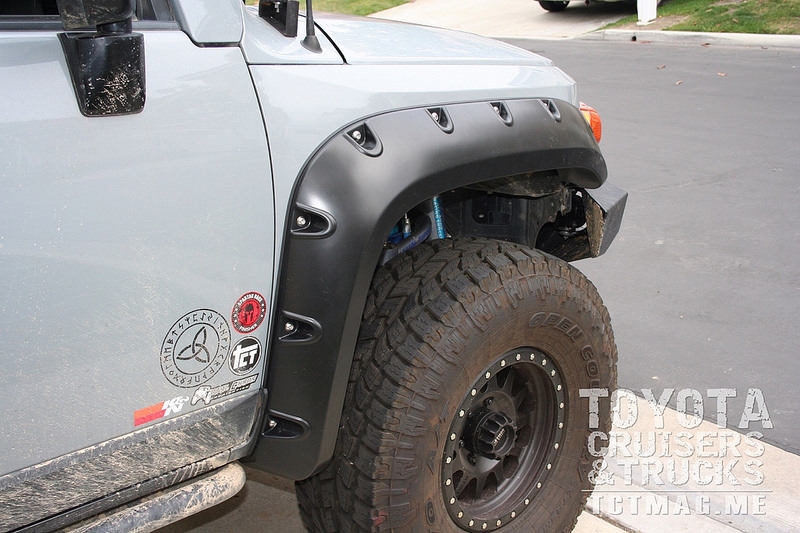
The Finished Look
From start to finish, this entire project took me about 5 hours. A significant chunk of that time was likely because ofmy bumper which required extra work to make the Bushwackers fit. After all was said and done, I’m definitely satisfied with the results. They look good and add something extra to the overall appearance ofmy cruiser. I would recommend these fender flares for their (general) ease and simplicity of installation, and for the way they complement the FJ’s look so well.
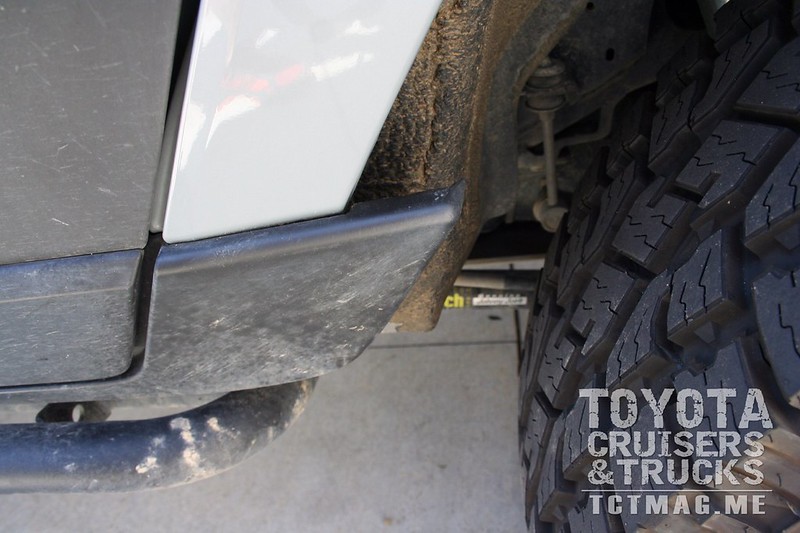
Body molding before modification

Body molding after modification

The finished look
More Photos!
[flickr set=72157672907954153]
![]()
To get your copy of theSummer 2016 Issue:   FIND US ON: |