
 The installation process between the common snorkel kits for the Toyota Tacoma is very similar. They all require a disregard for the well-being of the truck body and/or some liquid courage to help you get over the idea of drilling into your prized possession. The main variations lie in the plumbing running from the snorkel to the factory airbox. Installation will take normally 3-6 hours, depending on the amount of liquid courage you decide to have and any unforeseen delays. Here are some tools needed and highlights of the installation process of the Airflow snorkel on a 2006 Toyota Tacoma.
Tools needed:
- Masking tape - Round and flat files
- Hammer and center punch - Primer and/or touch up paint
- Screw drivers - Additional fender clips maybe needed
- 105mm hole saw - Assorted drill set
- Wet/dry sand paper - Saw or cut-off wheel
- Liquid courage (age dependent)
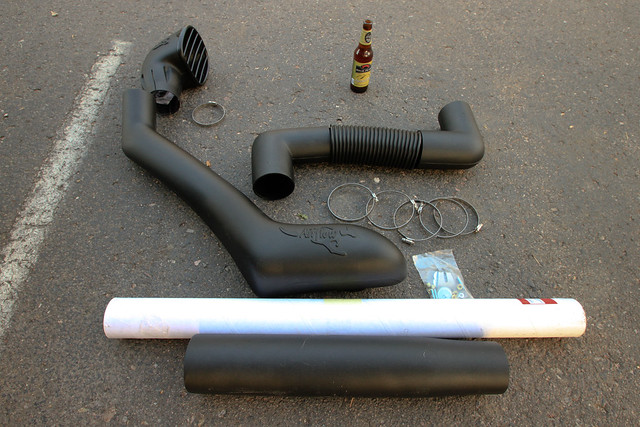
After laying out the provided parts from Airflow to ensure all parts are present, take the provided template and cut out any excess material to make alignment easier.
Secure the template on to the truck’s body, using the body lines to matchup with the template. Using a center punch, mark where indicated on the template. These holes will be the mounting points of the snorkel as well as the hole used for the intake coming from the snorkel into the fender. When all hole centers are marked, remove the template and make sure you are up to date on your liquid courage.
With a small drill bit, you can start pilot holes where you had marked with the center punch. Using masking tape, cover the areas that will be drilled into to help prevent chipping of the paint. With the pilot holes as your guide, finish off the mounting holes with a 10mm (or equivalent) drill bit. The 105mm hole saw will then be used to make the hole for the snorkel intake tube. Round files can be used to clean up the edges on the holes. To prevent rusting on the bare metal now exposed, use either a zinc rich primer or touch up paint along the edges.
With the mounting and intake holes drilled, cleaned up and painted, you can use the snorkel assembly to mock up for any fine tuning adjustments with the mounting holes. During this process, the A pillar bracket positioning can be mocked up and mounting holes created. Once again, these holes should be cleaned up and painted to prevent rusting in the future.
The Airflow kit allows full use of the factory intake, however, installation does require slight modification to the end of the intake tube. With your preferred cutting device, chop off the cup at the end of the factory intake tube.
With the factory intake modified to fit the connecting plumbing from the snorkel, the snorkel plumbing can be routed from the snorkel intake through the fender where it will be joined to the factory intake in the factory intake hole in the fender (removal of the fender liner is necessary to gain access to the snorkel intake). Using ample amounts of silicone sealant, connect the snorkel intake to the provided tubing and secure with the provided hose clamps. A flexible hose is used within the fender to connect the snorkel to the factory intake with rigid elbows at both ends.
In this installation, a 4” rubber coupling was used to join the snorkel plumbing to the factory intake. This is not necessary, as the factory intake will fit directly in the provided plumbing. Make sure with all plumbing connections to use a sealant.
Once all the plumbing is sealed and secured, attention can be turned to securing the snorkel assembly to the body. Ensure that all fasteners have washers fitted and do not over tighten the nuts in this process.
With the snorkel firmly attached to the body and the A pillar, the air ram can be attached to the top of snorkel and secured using the provided hose clamp. As an added measure of security, Airflow provides a self tapping screw to secure the air ram in a forward facing direction. (Airflow warns that at speeds above 15mph, a vacuum may be generated causing engine damage if the air ram were turned around)
Final step, get out and ENJOY!
Photos!
[flickr set=72157633191498265]


Remember, tell your friends! They can subscribe for FREE using this link!
Find Us On: 

.
{fcomment}