
Winch Rebuild
 Recently I had the urge to upgrade my Warn M8000 winch with a 3/8” synthetic rope by Southeast Overland. Unfortunately, as I was spooling in the new rope, my winch decided to check out (better in the lot and not on the trail at least!). With all signs pointing to the motor, my fingers got to searching the local for-sale sections for other options. After a bit of looking, I came across a used Warn XD9000 that was in decent shape for the price. After hearing from a friend of a recent successful rebuild of his winch, I figured it’s time to see how these things work on the inside and see what condition the new purchase was really in. Rebuild time!
Whether it’s to inspect and rebuild a new winch, rebuild a tired winch or just to clean out years of gunk out of your current winch, when it comes time to tear down and rebuild a winch, it’s actually much easier than you may think. With some common hand tools, new grease, cleaning solution and a couple hours, you can give your winch a new lease on life.
No matter the manufacturer, you can find a diagram on most manufacturers’ websites (for Warn, http://www.warn.com/store/service_parts.jsp).
During the disassembly process, it is useful to be organized in laying out the parts as you remove them from the winch for easy reassembly (this is where the manufacturer diagram can come in handy as well). Take note of the orientation of the clutch lever/end housing relative to the drum support as you will want to keep the same orientation when you reassemble to ensure proper alignment of the clutch lever when you reinstall on your truck.
1. Start the disassembly process with the removal of the clutch engagement lever, metal retainer and O-ring. Remove the clutch lever detent screw to release the lever.
2. Loosen the 10 hex screws holding the end housing on. This will free up the end housing that holds the sliding ring gear and several planetary gear sets.
3. With the end housing removed and the planetary gears pulled off the hex shaft, you can begin to see how the winch gets its pulling power. Through the use of the planetary gear sets, the winch is able to have massive gear reduction providing the necessary torque to pull your truck out of that thick mud hole you got yourself into!
4. This is when organization comes in handy. As you are taking the gears apart, keep track of the order in which you pull each part off as you will be reassembling in the reverse order.
5. After removing the gear sets and drive gear from the hex shaft, the two hex screws can be removed and separate the drum support from the two support rods.
6. Now that the drum has been exposed, it can now be separated from the motor end and the disassembly process is nearly complete. Once again, pay close attention to where you took all the parts from and the order in which they came off.
7. At this point, the motor coupler and splined motor shaft can be inspected for signs of wear. Check for cracking or damage as well as any play or looseness in the bearing. This is a good point to replace the motor assembly if needed. Do not remove the brake or apply any lubrication to the brake!
8. Now that you tore your prized trail tool apart and is sitting on your work space in pieces, this is the time to go over the parts and inspect them as well for signs of wear and replace any part if necessary. Check the bronze bushing in the end housing for excessive play between the bushing and housing. Inspect the drive shaft for any excessive play or signs of wear. Check the gear sets for excessive wear and tear.
9. After inspecting and cleaning all of the winch parts and gears, it is time for reassembly.
10. Using your favorite gear grease (Warn recommends using Molylube 1 or Aeroshell 17 or 33SM), lightly grease the motor-side drum support bushing and splines then press on the support and motor coupler. At this point the drum can be installed and the second drum support bushing can be lightly greased and installed. Reinstall the outside drum support to the support rods with the two hex screws. Make sure the drum spins smoothly at this point before you go any further. Almost there!
11. The hex shaft can now be slid back through the drum into the brake assembly. Apply grease on the splined drive gear and install over the hex shaft and into the drum end.
12. Apply a light coating of grease on the end housing bushing and on the inside of the end housing where the sliding ring gear will sit. Keep in mind that the beveled spline ends on the sliding ring gear should face the back of the end housing.
13. This is where you get to test your organization skills!
14. Apply grease to each of the gear sets before reassembly (Warn recommends that the gear assemblies be liberally greased but not to pack the end housing with grease). Place the small sun gear into the end housing. The two planetary gear sets can then be placed into the end housing. Place the thrust washer on top of the planetary gear sets (step-side up).
15. Place the larger planetary gear set over thrust washer and smaller gear sets, followed by the large ring gear. At this point you will have a complete end housing ready for assembly onto the drum support. Align the end housing onto the drum support and secure with the 10 hex screws. Tighten the screws down evenly around the end housing. Finally the clutch lever, seal and retainer can be installed.
16. Now you have a winch with a new lease on life!
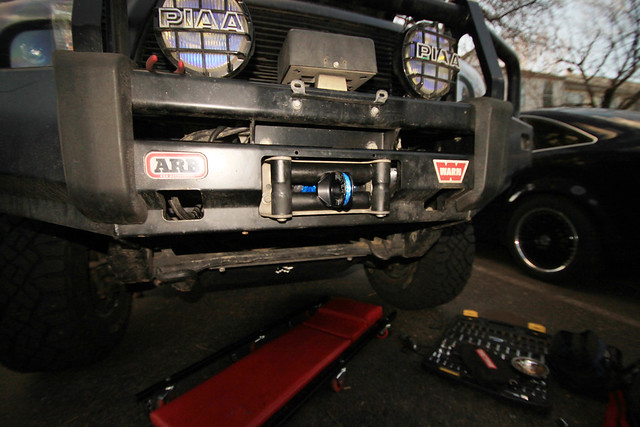
With the winch ready to get back to work, you can now reinstall on the truck and spool up your cable or rope. To finish off the upgrade to my recovery setup, I finally was able to spool up my 3/8” synthetic rope, new Daystar rollers and Masterpull thimble stop that have been collecting dust!
Photos!
[flickr set=72157634750334986]


Remember, tell your friends! They can subscribe for FREE using this link!
Find Us On: 

{fcomment}
