
BajaRack / Rigid LED Install
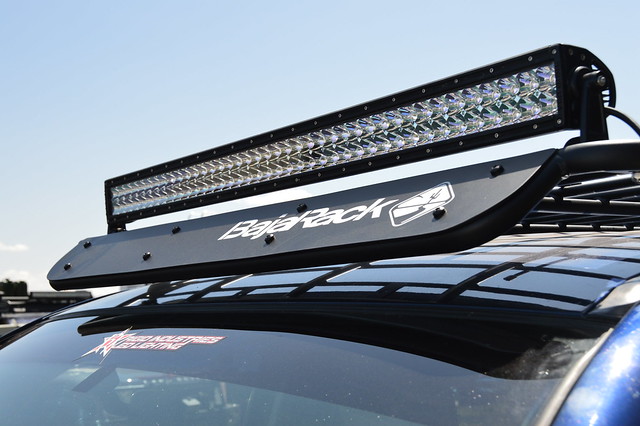 This year we made our first attempt at an “onsite – live build” at the Overland Expo. With the help from our friends at both Baja Rack and Rigid Industries we were able to pull it off. The price tag on this build was $1834.99 with the price of the Baja Rack Utility rack at $535 and the price of the Rigid Industries E-Series 40” LED Light Bar being $1299.99.
Specs:
Baja Rack Utility Rack: Rigid Industries E-Series 40” Light Bar:
48” X 60” 16,800 Lumens at 160 Watts
1”,3/4”,and 1/2” steel tubing 10 degree Spot Pattern
Aluminum Wind Deflector LED Lights
Weight 42#’s Plug-N-Play Wiring Harness
Weight Capacity 200#’s
4 Mounting Brackets
We had some fairly mild preparations to make the night before. For ease of the build we made the initial taps through the rubber strip in the rain gutter and started the bolts for the four mounting brackets. When it was time for the build to go live we had a four step build:
Step one – Install the Baja Rack onto the mounting brackets
Step two – Tighten down the rack mounts down
Step three – Mount the Rigid Industries LED Light Bar using the mount positions on the rack itself
Step four – Run the wires and mount the toggle switch
When you have everything prepped and an order to what you are building, it should be a very straight forward build, right? As you can guess, nothing went that easy. We had a few problems with our build. The taps in the roof gutters were gummed up and hard to start, much less thread the bolt in the hole. If we were home or working in a shop this might be a different story, however, we brought with us a very limited selection of tools. My favorite dilemma was the standard wiring kit, apparently most people just drill a hole and run the wire under the trim by the drivers door. Call me crazy, I didn’t want to put another hole in the roof and create a possible leak point. By the time I got home Rigid Industries sent me a wiring kit long enough to run the wire along the Baja Rack down the back of the cab, along the frame, then up into the engine compartment and the cabin.
Now that I am home, I am planning on cleaning up some of the details. I am planning on purchasing a Toyota switch to replace the Rigid Industries toggle to make it look and work in more of a uniform manner.
We definitely have some bugs to work out for the next live build, however, I think it went pretty well, I mean “it got built”. Next time we are not doing a live feed unless “EVERYTHING” is on site, pre-fit, and all of the bugs figured out . . .
We want to thank Sergio Murillo and Alex Burgas at Baja Rack for helping with the installation of their Utility Rack. It’s always nice to have the owner and their engineer help with the install of their part of this build. From Rigid Industries we want to thank Taylor Anderson and Dave Davis for a great Light Bar and their part in this build. I need to thank Valerie, Marketing Manager from Rigid Industries, for her ability to think on her feet to help with the installation of the Light Bar and their wiring harness. Of course we couldn’t have done any wiring without the great help from Jeff Downer from Expedition Overland. Last but not least, thanks to our publisher Shane for making our digital method work so well.
Now, I can say “I am just about ready for summer”. Look for the Roof Top Tent and the Topper in the next issue . . .
Sources: Rigid Industries | BajaRack
Photos!
[flickr set=72157634742220411]


Remember, tell your friends! They can subscribe for FREE using this link!
Find Us On: 

{fcomment}
