
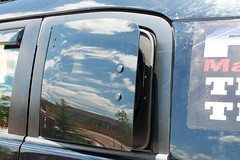
 When the FJ first went on sale in 2006, everyone was ecstatic about the new Toyota 4x4 vehicle. Those of us that were there when the first FJ’s began showing up at dealerships were completely in awe of the new truck – except for one small issue: the rear door windows. We were (and still are) completely baffled by Toyota’s decision not to install vent windows for the back seat of the FJ. Vents are very standard on most modern vehicles, especially for a back seat where children ride most of the time.
After countless hours of prototypes, test installs, and design changes, Doug Walsh from Dark Horse Enterprises was able to develop a great rear window solution for the FJ Cruiser. FJ Freedom Windows replace the OEM glass with high-quality scratch resistant plexy that are tinted to match the factory windows. The install process has several steps, but overall it is a moderate install.
While we won’t get into the details of the install (the provided instructions and six part YouTube video are excellent), we do want to pass on a few pointers we learned from our install.
First, we recommend having a professional remove your OEM glass. We bought a removal kit from Harbor Freight to remove one side, just to see how difficult it is. The problem isn’t that the windows are hard to remove (they’re just glued in), the issue is that without the right tools it takes a LONG time to remove them. The kit we used included heavy-duty wire that you thread from the outside to the inside of the window to basically ‘saw’ through the glue to get the window out. That works for 3 of the 4 sides, but for the bottom you need a long, very sharp knife to get the job done. Also, there are ‘locator’ clips glued to the glass that are very difficult to get out. Once you finally get the glass out, you have to use a sharp putty knife or utility razor to cut the glue out. This is the part that took us well over an hour to finish. If at all possible, a professional can do this job much quicker.
For the second window, we stopped by Service Auto Glass in Colorado Springs to see how the professionals do it. DJ and John were kind enough to help out and literally had the glass out and frame cleaned up in about 20 minutes. While the charge for that one piece of glass was $50, less frustration and the knowledge gained were well worth it. It really is all about the tools, and a glass company has the right tools for this job.
Once the windows are removed, it’s a simple matter of stepping through the instructions to get the new windows installed. FJ Freedom Windows come with a template that you use to mark the 6 holes you will be drilling in the door. Once the holes are drilled (the instructions call for a 9/64” bit but we also used a 1/8” bit for the rear mount), you’ll test fit the steel frame to make sure everything lines up. The entire frame is secured with heavy-duty automotive foam tape to help keep moisture out of your FJ, so you want to make sure everything is right before installing. After your test fit you can remove the backing on the adhesive and mount the frame on the door. Rivets secure the hinges and frame to the door and screws hold the rear handle/frame to the door.
It’s imperative that you use the provided template and instructions to ensure your holes are all lined up. It’s well known that FJ’s have a tolerance of about +/- 1/16” of an inch, so keeping everything lined up and double, triple, or quadruple checked is a necessity.
After installing the frame, hinges, and handle, it’s time to test fit the window before you install the final rubber seal. You’ll notice that the window fits the frame very tightly so it takes some practice to install it smoothly. On the second windows we left masking tape on the top of the door frame to avoid scratches, we didn’t on the first window so now there’s a small scratch on the top of the frame. Once your satisfied with the test fit, install the rubber seal around the edge of the new frame as an additional water barrier, and the install is complete.
We’ve literally only had the windows installed for two days at the time of writing, so we’ll report back on how well these work out. We can say that the fit, finish, and quality of the Freedom Windows are excellent, so we don’t expect any problems. Installation does take some time and patience to ensure it’s done properly. Still, we think this is one of the best mods you can install on your truck.
More Photos!
[flickr set=72157627201969686]
Get a copy of the July issue!

NOTE: Internet Explorer users should right click and select "Save Target As"